
Think about the last time you used an app or a website that was incredibly frustrating. Maybe you couldn't find the button you needed, or the navigation felt like a maze. Now, think about a product that just worked—one that felt intuitive and almost knew what you wanted to do before you did it. The difference between those two experiences is a well-defined UX design process.
UX, or User Experience, is not just about making things look good. It's the systematic approach to making products and services useful, usable, and enjoyable. It's a journey that puts the user at the center of every decision, ensuring that the final product solves real-world problems and meets real-world needs. In this article, we’ll break down the essential steps of a standard UX design process, showing you how to build a product that your users will love.
What is a UX Design Process?
At its core, a UX design process is a series of repeatable steps that guide a designer from a problem to a solution. It’s a framework for tackling complex design challenges in a methodical and user-centered way. Instead of just brainstorming ideas and jumping straight to a final design, a UX process ensures that every decision is informed by user research, data, and testing. It's a crucial part of creating a product that is not just beautiful, but also functional and delightful. It’s important to clarify that this process is entirely different from the role of a UI designer. While UI (User Interface) is focused on the visual look and feel of a product (the buttons, colors, fonts), UX is focused on the entire journey a user takes. For a full breakdown, see our article on the difference between ui and ux. The UX design process can be broken down into seven key phases. While they are often shown as a linear path, in reality, it's an iterative and cyclical journey. You'll often find yourself looping back and forth between stages as you learn more about your users and your product.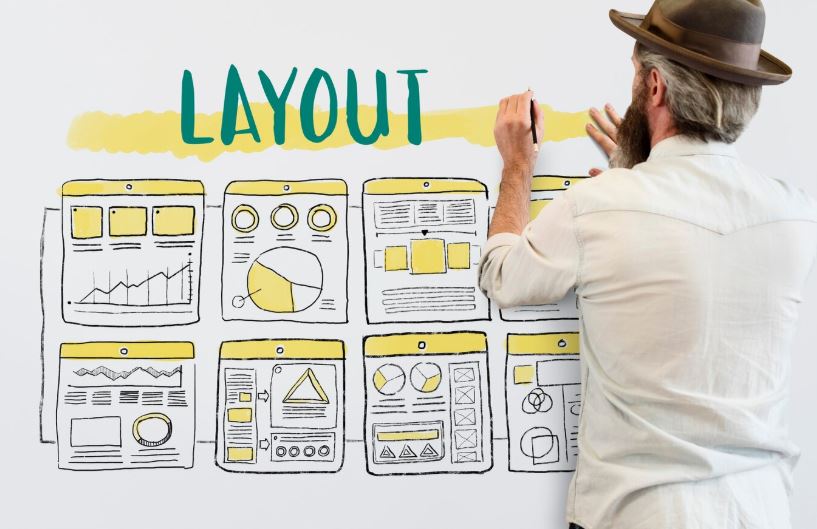
1. Conduct User Research
The first and most critical step is to understand the people you're designing for. This is where you put your assumptions aside and listen to your potential users. User research is the foundation of the entire process.- Methods: You can use a variety of research methods, including surveys, one-on-one interviews, and competitive analysis, to understand what other products are doing. You might also analyze existing data from a previous version of your product or a competitor's product.
- Goal: The goal here is to identify your users’ behaviors, motivations, pain points, and needs. You want to answer questions like: Who are our users? What problems are they trying to solve? Why are they using (or not using) our product?
2. Define User Needs and Goals
Once you have a mountain of research data, the next step is to synthesize it into clear, actionable insights. This is the "Aha!" moment where you start to see patterns and define the core problems you need to solve.- Methods: This stage often involves creating user personas (fictional characters that represent your target audience), user journey maps (visual representations of the steps a user takes to achieve a goal), and problem statements.
- Goal: The goal is to clearly define the problem you're solving and articulate it in a way that everyone on the team can understand. This phase ensures that the entire project is aligned around a common, user-focused objective.
3. Develop Information Architecture
Now that you know who your users are and what problems they need to solve, you can start organizing the content of your product. Information Architecture (IA) is the art and science of organizing and structuring content in an effective and sustainable way.- Methods: This involves creating sitemaps, user flows (diagrams showing the path a user takes through the product), and content inventories. You want to make sure your product's navigation is intuitive and logical so users can find what they're looking for without getting lost.
- Goal: The goal is to create a solid structural foundation for your product. A well-designed IA ensures that the user's journey is smooth and the content is easy to find, which is crucial for a positive user experience.
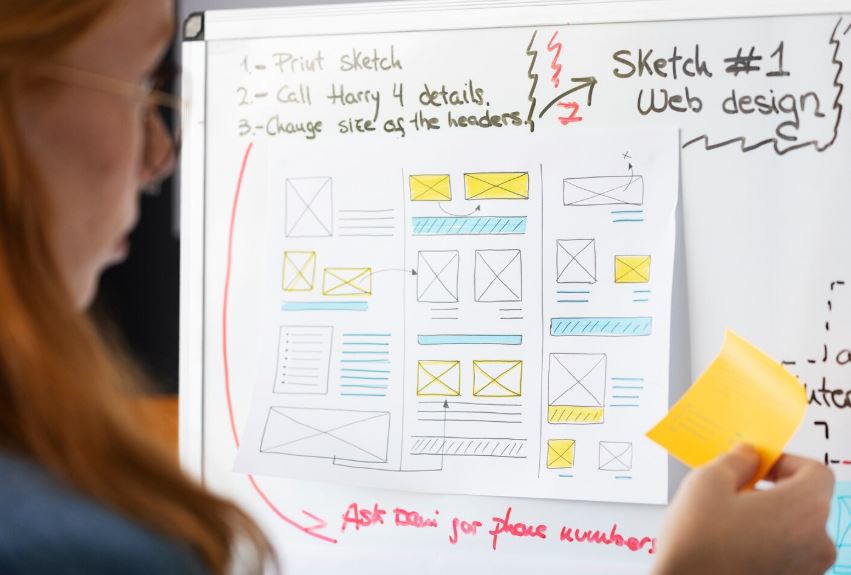
4. Create Wireframes and Prototypes
With a solid structure in place, it’s time to start sketching out the product's layout. Wireframes are low-fidelity, black-and-white layouts that represent the skeletal framework of an interface. They focus on the core functionality and content hierarchy, not on the visual design.- Methods: You can create wireframes on paper or use digital tools. Once the wireframes are approved, you can turn them into interactive prototypes. Prototypes are a realistic, clickable version of your product that you can use for testing.
- Goal: The goal is to test the product’s functionality and user flow before spending time and money on a final design. This is a quick and cheap way to catch usability issues and make major changes early in the process.
5. Design Visually Appealing Interfaces
This is the phase where you take the wireframes and give them a visual identity. This is where UI design comes into play. The visual design should be more than just aesthetically pleasing; it should enhance the usability of the product and reflect the brand’s identity.- Methods: This involves choosing color palettes, typography, and icons, and creating a style guide. The visual design should be consistent across the entire product.
- Goal: The goal is to create a product that is not only functional but also looks professional and trustworthy. Good visual design is often guided by universal ux design principles that make interfaces intuitive and delightful to use.
6. Perform Usability Testing
This is the most critical part of the process, where you get real feedback from real users. You give your interactive prototype to users and ask them to complete specific tasks.- Methods: This can be done through moderated sessions where you watch users interact with your prototype and ask them questions, or through unmoderated sessions where you record users performing tasks on their own.
- Goal: The goal is to identify any usability issues, confusing navigation, or frustrating user flows. This feedback allows you to go back and refine your designs. This iterative process of testing and refining is what leads to a truly user-friendly product.
7. Implement and Optimize
Once the design is finalized and tested, it’s time to hand it over to the development team. But the UX designer’s job isn't over.- Collaboration: You'll work closely with the developers to ensure the final product matches your vision and that all usability and design requirements are met.
- Post-Launch Analysis: After the product is live, you'll analyze user data and feedback to see how people are actually using it. This feedback can be used to plan future updates and improvements. This is an essential part of a comprehensive web design service because a website is never truly "finished."
How to Build Your Own Process and Improvise on It?
The UX design process is a framework, not a rigid set of rules. The key is to be flexible and adapt the process to the needs of your project. For a small project with a limited budget, you might do a simplified version of each step. For a large, complex project, you might spend months in the research and testing phases. The most successful designers and teams are those who are agile and able to improvise. The process should serve you, not the other way around.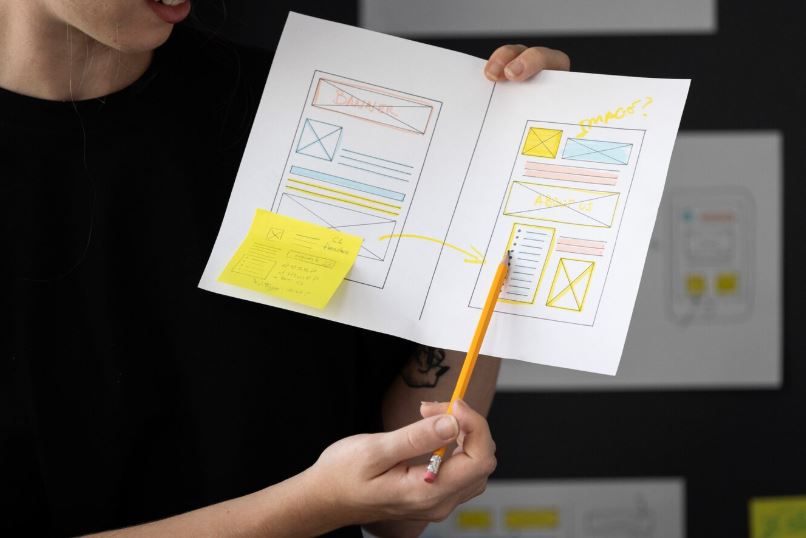
How to Implement a Design Process?
If you're a designer looking to bring a UX process to your team, start small. Begin with a single project and get buy-in from your stakeholders. Show them the value of the research phase by presenting a key insight that changes a core assumption. Show them the value of prototypes by catching a major usability issue before any code is written. Proving the value of each step is the best way to get a team to adopt a user-centered design approach. Conclusion The UX design process is a powerful tool for creating products that are not only successful but also genuinely loved by their users. It's a journey that prioritizes understanding the user, solving their problems, and constantly refining the solution based on feedback. By following this systematic approach, you move beyond just building a product to building an experience. For businesses that are looking to create a seamless, user-centered digital presence, working with a specialized partner can be a game-changer. A professional team like HDM Agency can guide you through this process and ensure your product meets the highest standards of user experience. FAQ- Is the UX design process only for new products? No. The UX design process can be applied to existing products as well. For an existing product, you would use the process to identify and fix usability issues, introduce new features, or improve an existing user flow.
- How long does the UX design process take? The length of the process depends entirely on the size and complexity of the project. A small website might take a few weeks, while a large, complex application could take several months or even a year.
- Can one person do the entire UX design process? Yes, for small projects, one person might wear all the hats. However, for larger projects, it’s common to have a team of specialists, including UX researchers, information architects, and UI designers.
- Is user research really necessary? Yes, user research is arguably the most important step. Without it, you are designing for yourself, not for your users. Research prevents you from making costly assumptions and ensures that your product is solving a real problem.